
How to Clean a Hat: The Ultimate UK Guide to a Fresh Look
A favourite hat is more than just an accessory; it’s a statement, a companion on sunny days, and a shield against the unpredictable UK weather. But with regular wear comes the inevitable build-up of dirt, sweat, and grime. Knowing how to clean a hat correctly is the key to preserving its shape, colour, and character for years to come. This comprehensive guide will walk you through the precise steps to wash any type of hat without causing damage, ensuring your cherished headwear always looks its best.
Table of Contents
- 1. Before You Start: Assessing Your Hat’s Material and Construction
- 2. Gathering Your Essential Hat Cleaning Toolkit
- 3. The Ultimate Guide to Hand-Washing Your Hat
- 4. Mastering Spot Cleaning for Stubborn Stains
- 5. Cleaning Speciality Hats: A Delicate Approach (Felt, Straw, and Leather)
- 6. The Crucial Steps: How to Dry and Reshape Your Hat Properly
- 7. Long-Term Hat Care and Storage Solutions
Before You Start: Assessing Your Hat’s Material and Construction
Before a single drop of water touches your hat, a thorough assessment is non-negotiable. Different materials react to water and cleaning agents in vastly different ways. Misidentifying the fabric can lead to irreversible shrinkage, discolouration, or loss of shape. Take a moment to become a hat detective—it’s the most critical step in the entire process.
Identify the Material
First, check for a care label inside the hat. This is your most reliable source of information. If it’s missing or faded, you’ll need to identify the material by touch and sight. Common hat materials in the United Kingdom include:
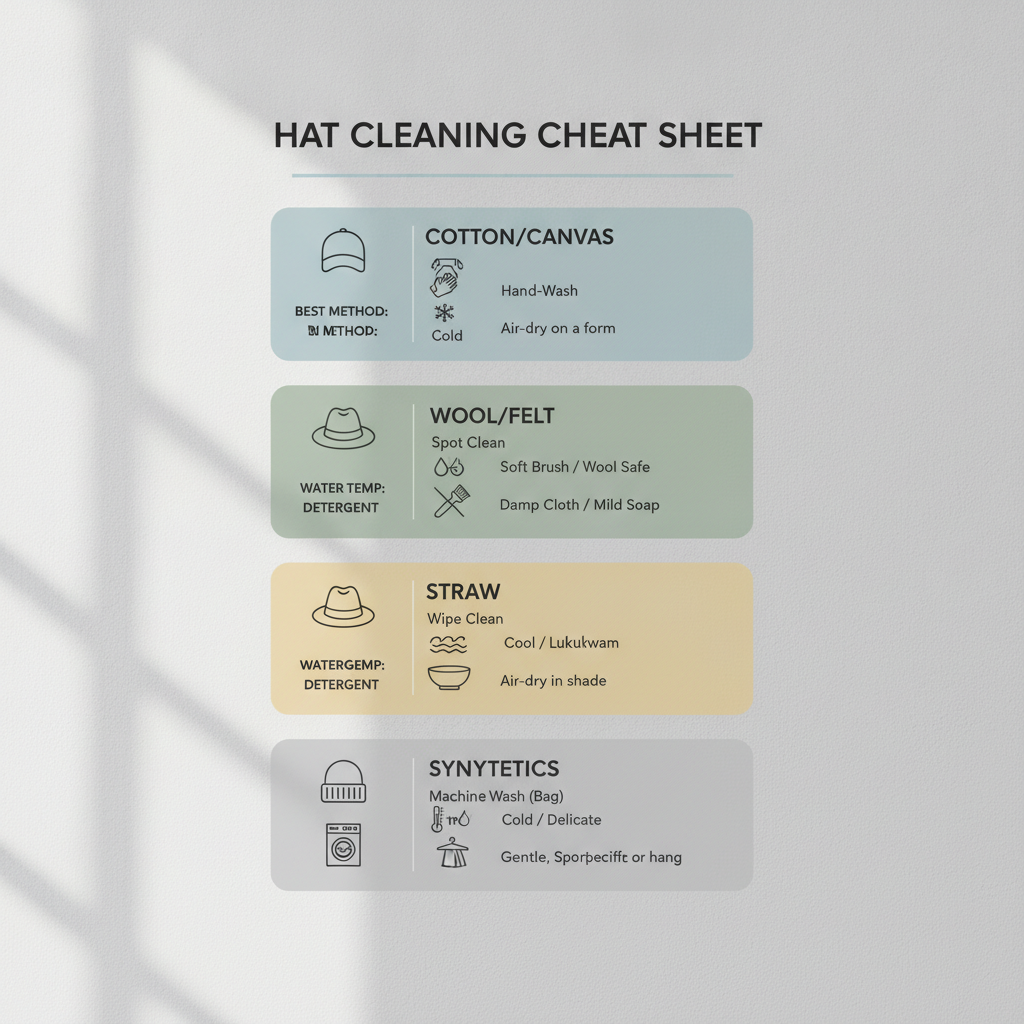
- Cotton & Canvas: Common for baseball caps, bucket hats, and casual flat caps. They feel sturdy and have a visible weave. Generally, they are quite durable and can handle a gentle hand wash.
- Wool & Felt: Used for fedoras, trilbies, and many classic winter hats. Wool felt is dense and soft. It’s highly susceptible to shrinking and losing its shape when oversaturated with water, making spot cleaning the preferred method. For more information on this material, you can explore the history and properties of Felt on Wikipedia.
- Synthetics (Polyester, Nylon, Acrylic): Often found in sports caps, beanies, and performance headwear. These materials are resilient, hold their colour well, and are generally safe for hand-washing.
- Straw: The material of choice for Panama hats, boaters, and summer headwear. Straw is brittle when wet and can easily misshape or rot if not cleaned and dried properly. It should never be submerged in water.
- Leather & Suede: These require specialised cleaners and conditioners. Water will stain and stiffen leather and suede, so a dedicated approach is essential.
Check the Brim and Construction
The material of the brim (or peak) is just as important as the crown. Vintage baseball caps (typically pre-1980s) often have a cardboard insert in the brim. Submerging a cardboard-brimmed cap will turn it into a mushy, misshapen mess. Gently tap or flex the brim. If it feels rigid and papery, it’s likely cardboard. Modern caps almost always use a durable, washable plastic.
Perform a Colourfastness Test
Never skip this test, especially with brightly coloured or dark hats. A colourfast fabric will not bleed or fade when cleaned. Here’s how to check:
- Find an inconspicuous spot on the hat, such as the underside of the brim or inside the sweatband.
- Dampen a white cloth with cool water and a tiny amount of the cleaning solution you plan to use.
- Gently dab the test area.
- Check the white cloth for any colour transfer. If you see any dye on the cloth, do not proceed with washing. Stick to spot cleaning with water only or consult a professional cleaner.
Gathering Your Essential Hat Cleaning Toolkit
Having the right tools on hand makes the cleaning process smoother, safer, and more effective. You don’t need a professional setup, just a few household items. Avoid harsh chemicals, stiff brushes, and high heat at all costs.
Your basic toolkit should include:
- A Soft-Bristled Brush: A baby brush, a soft-bristled toothbrush, or a dedicated hat brush is perfect for dislodging surface dust and for gentle scrubbing.
- Microfiber Cloths: You’ll need at least two – one for cleaning and one for blotting dry. They are gentle and highly absorbent.
- Mild, Non-Bio Detergent: Choose a detergent free from bleach and harsh chemicals. A wool-specific wash like Woolite is an excellent, safe choice for many hat types.
- A Clean Bowl or Sink: This will be your washing basin. Ensure it’s thoroughly cleaned before you begin to avoid transferring any dirt.
- A Hat Form or Rolled-Up Towel: Essential for helping the hat maintain its shape while it air-dries. A canister or ball can also work.
- Specialised Cleaners (Optional): For materials like felt, straw, or leather, you may need specific products like a felt sponge, a leather conditioner, or a dedicated stain remover.
The Ultimate Guide to Hand-Washing Your Hat (For Cotton, Canvas & Synthetics)
For durable hats like baseball caps, beanies, and bucket hats, hand-washing is the safest and most effective method. It gives you complete control, preventing the damage that washing machines and dishwashers can cause. Never put a structured hat in a washing machine; the agitation can destroy its shape permanently.
Step 1: Pre-Treat Stains
Before submerging the hat, address any noticeable stains, particularly around the sweatband. The sweatband absorbs oils and perspiration, often leading to yellowing or discolouration. Apply a small amount of your mild detergent or a paste of baking soda and water directly to the stained area. Let it sit for 15-20 minutes. Gently work it in with your soft-bristled brush in a circular motion.
Step 2: Prepare the Washing Solution
Fill a clean sink or bowl with cool water. Hot water can cause shrinking and fading, so always err on the side of caution. Add about a tablespoon of your mild, non-bio detergent and swish the water to create a gentle, soapy solution. Avoid creating excessive suds, as they can be difficult to rinse out completely.
Step 3: The Gentle Wash
Submerge the hat in the cool, soapy water. Let it soak for about 30 minutes to an hour, depending on how soiled it is. This initial soak will lift a significant amount of dirt without any harsh scrubbing. After soaking, use your hands or a soft cloth to gently wash the hat, paying extra attention to soiled areas. For tougher spots, use your soft brush with very light pressure. Treat the hat as you would a delicate garment.
Step 4: Rinse Thoroughly
Drain the dirty water and refill the sink with clean, cool water. Submerge the hat again, gently squeezing it to work out the soap. Repeat this process until no more suds appear and the water runs clear. It’s crucial to remove all detergent residue, as it can attract more dirt and irritate your skin.
Mastering Spot Cleaning for Stubborn Stains
Spot cleaning is your go-to method for delicate hats (like felt or straw) and for tackling isolated stains on washable hats. The key is to act quickly and use the right technique for the type of stain. For a comprehensive overview of stain types, the American Cleaning Institute’s stain removal guide offers excellent advice applicable to textiles.
How to Remove Sweat Stains
Sweat stains are the most common issue for hat wearers. The salt and oils from perspiration can leave unsightly yellow or white marks, especially on the sweatband and crown.
- Create a paste using four tablespoons of baking soda and a quarter-cup of warm water.
- Apply the paste directly to the sweat stains with a soft brush.
- Let it sit for up to an hour. You may see the baking soda drawing the stain out.
- Rinse the area thoroughly with a cloth dampened with cool water, blotting until all residue is gone.
Tackling Makeup and Oil-Based Stains
Makeup, sunscreen, and natural skin oils can leave greasy marks. For these, a mild dish soap that’s designed to cut through grease can be effective. A small dab of shampoo can also work. Apply a tiny amount directly to the stain, gently work it in with a damp cloth, and then ‘rinse’ by blotting with a clean, water-dampened cloth until the soap is removed.
Dealing with Dirt and Mud
If you get mud on your hat, resist the urge to wipe it off while it’s wet. This will only smear it deeper into the fabric. Let the mud dry completely. Once dry, much of it can be gently flaked or brushed off with your soft-bristled brush. For any remaining mark, dab it with a cloth dampened with cool water and a tiny drop of detergent.
Cleaning Speciality Hats: A Delicate Approach (Felt, Straw, and Leather)
Speciality materials demand special care. These hats are often an investment, and understanding how to clean them properly is vital. Our commitment to quality craftsmanship at Maz Accessories means we want you to have the knowledge to care for your finest pieces.
How to Clean a Felt Hat (e.g., Fedora, Trilby)
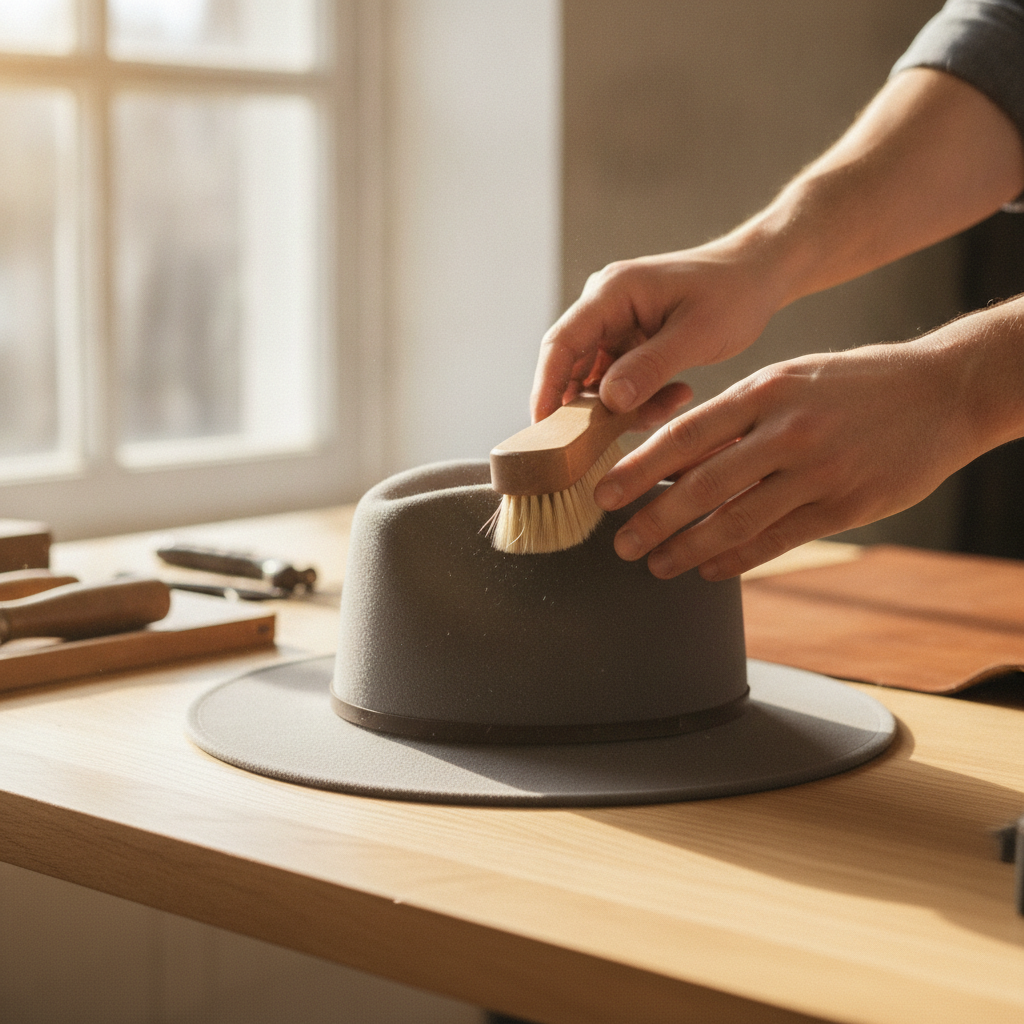
Felt hats are moulded into a precise shape that water can easily ruin. The primary cleaning method is dry brushing.
- Regular Dusting: Use a soft-bristled hat brush and always brush in a counter-clockwise direction, following the grain of the felt. This removes surface dust and keeps the finish smooth.
- Removing Lint: For stubborn lint, you can use a lint roller or a piece of sticky tape wrapped around your fingers.
- Minor Stains: For small, non-oily stains, a dedicated felt sponge (or even a slice of stale bread or a rubber art gum eraser) can be used to gently rub the mark away.
- Grease Stains: Sprinkle the spot with cornstarch or talcum powder. Let it sit for several hours to absorb the oil, then brush it away. Repeat if necessary. For anything more severe, consult a professional hat cleaner.
How to Clean a Straw Hat (e.g., Panama, Boater)
Straw is a delicate, natural fibre. Never soak a straw hat. The key is a light touch.
- Dust Removal: Wipe the hat with a clean, dry microfiber cloth. A can of compressed air can also be used to blow dust from the weave.
- Light Cleaning: Dampen a white cloth with a solution of cool water and a few drops of mild soap. Gently wipe the surface of the hat. Immediately follow with another cloth dampened with only water to ‘rinse’ it.
- Drying: Pat the hat dry with a clean towel and let it air-dry in a cool, well-ventilated area away from direct sunlight, which can make the straw brittle.
How to Clean a Wool Hat or Beanie
Wool is a fantastic material, but it’s prone to shrinking with heat and agitation. For wool beanies or caps, hand-washing is best. The experts at the Woolmark Company provide an authoritative guide to washing wool. The process is similar to the general hand-washing guide but with extra care:
- Use a dedicated wool-wash detergent.
- Use only cold or lukewarm water. Never use hot water.
- Do not wring or twist the hat. Gently squeeze the water out.
- Lay the beanie flat on a towel to dry, reshaping it as needed. Do not hang it, as the weight of the water will stretch it out of shape.
The Crucial Steps: How to Dry and Reshape Your Hat Properly
The drying stage is where many well-intentioned cleaning attempts go wrong. Improper drying can shrink, warp, or discolour your hat just as easily as improper washing. Patience is key.
Rule Number One: No Machine Dryers
Never, under any circumstances, put a hat in a tumble dryer. The high heat will shrink the fibres, warp the brim, and can even melt plastic components. Similarly, avoid using a hairdryer or placing the hat on a radiator. Intense, direct heat is the enemy of a well-shaped hat.
The Art of Air-Drying
The only safe way to dry a hat is to air-dry it.
- Remove Excess Water: After rinsing, gently blot the hat with a clean, dry towel. Don’t wring or twist it. Press gently to absorb as much moisture as possible.
- Create a Form: This is the most important part of retaining the hat’s shape. Find an object that mimics the shape of your head. A dedicated hat form is ideal, but you can easily improvise with a coffee canister, a small bowl, or a tightly rolled-up towel stuffed inside the crown. Ensure the form fills out the crown completely but doesn’t stretch it.
- Find the Right Spot: Place the hat on its form in a well-ventilated area away from direct sunlight and heat. A shady spot with good airflow is perfect.
- Be Patient: Depending on the material and humidity, it can take 24-48 hours for a hat to dry completely. Let it dry fully before wearing it to prevent it from losing its shape.
Key Takeaways
- Always Assess First: Identify your hat’s material and do a colourfast test before cleaning.
- Hand-Wash is Best: For cotton, canvas, and synthetic hats, gentle hand-washing in cool water with mild detergent is the safest method.
- Avoid the Machine: Never put a structured hat in a washing machine or tumble dryer.
- Spot Clean Delicates: For felt, straw, and leather hats, stick to dry brushing and targeted spot cleaning.
- Air-Dry on a Form: Always air-dry your hat on a form that mimics your head shape to prevent warping and shrinkage.
- No Direct Heat: Keep drying hats away from direct sunlight and heat sources like radiators or hairdryers.
Long-Term Hat Care and Storage Solutions
Proper cleaning is only half the battle. How you store and maintain your hat between wears will significantly impact its lifespan and appearance.
Proper Storage
Don’t just toss your hat on a table or hang it from a flimsy hook. This can cause the brim to flatten and the crown to crease.
- Hat Boxes: The gold standard for structured hats like fedoras and Panamas is a hat box. It protects from dust, sunlight, and being crushed.
- Shelves and Stands: If a box isn’t an option, store the hat upside down on its crown on a clean shelf, or use a dedicated hat stand. This preserves the shape of the brim.
- Caps and Beanies: These are more forgiving. They can be stacked loosely on a shelf or stored in a drawer. Avoid cramming them in, which can cause permanent creasing.
Regular Maintenance
A little care goes a long way. After each wear, give your felt or wool hat a quick brush to remove any surface dust. For caps, wipe the sweatband with a damp cloth occasionally to prevent sweat from setting in. This proactive approach means you’ll need to perform a deep clean less often.
Can I put my hat in the washing machine?
It is strongly advised not to put any structured hat, like a baseball cap or a fedora, in the washing machine. The agitation can permanently damage the hat’s shape and brim. Unstructured hats like beanies can sometimes be machine-washed on a delicate cycle in a laundry bag, but hand-washing is always the safest option to prevent shrinking and stretching.
How do I remove sweat stains from my hat?
The most effective DIY method for removing sweat stains is to create a paste of four tablespoons of baking soda and about 60ml of warm water. Apply this paste to the stained areas, let it sit for up to an hour, and then gently rinse it off with a cloth dampened with cool water. For stubborn stains, pre-treating with a mild detergent before a full hand wash can also be effective.
How often should I clean my hat?
This depends on how often you wear it and for what activities. For a hat worn daily or during exercise, a light clean of the sweatband every few weeks and a deeper clean every couple of months is a good rule. For hats worn less frequently, a deep clean once or twice a year, or as needed when stains appear, is usually sufficient. Regular brushing of felt hats is recommended after each wear.
Can I use a hairdryer to speed up the drying process?
No, you should never use a hairdryer or any other form of direct heat (like a radiator) to dry your hat. The intense heat can cause the fabric to shrink, warp the brim, and can even damage delicate materials like wool and straw. Always let your hat air-dry naturally in a well-ventilated area away from direct sunlight.
What’s the best way to clean a vintage hat?
Vintage hats require extreme care as their materials can be fragile and their brims may contain cardboard. Avoid submerging them in water at all costs. The best approach is gentle surface cleaning. Use a very soft brush to remove dust. For stains, use the spot-cleaning method with minimal water. If the hat has significant value or is very delicate, consulting a professional textile conservator, like those whose work is informed by principles from museums such as the V&A Museum, is the safest choice.
Conclusion: Preserve Your Style with Proper Hat Care
Cleaning your hat doesn’t have to be a daunting task. By correctly identifying the material, using gentle techniques, and allowing for proper drying, you can easily restore your favourite headwear to its former glory. A clean, well-shaped hat not only looks better but also lasts longer, protecting your investment and your style. Taking the time to care for your accessories is a rewarding process that ensures they remain a cherished part of your wardrobe for many seasons to come.
Ready to add a new, pristine piece to your collection? Explore our extensive collection of quality hats and find your next favourite. If you have any more questions, please feel free to contact our hat care experts.
