
How to Clean Hats: A UK Guide to Reviving Your Headwear
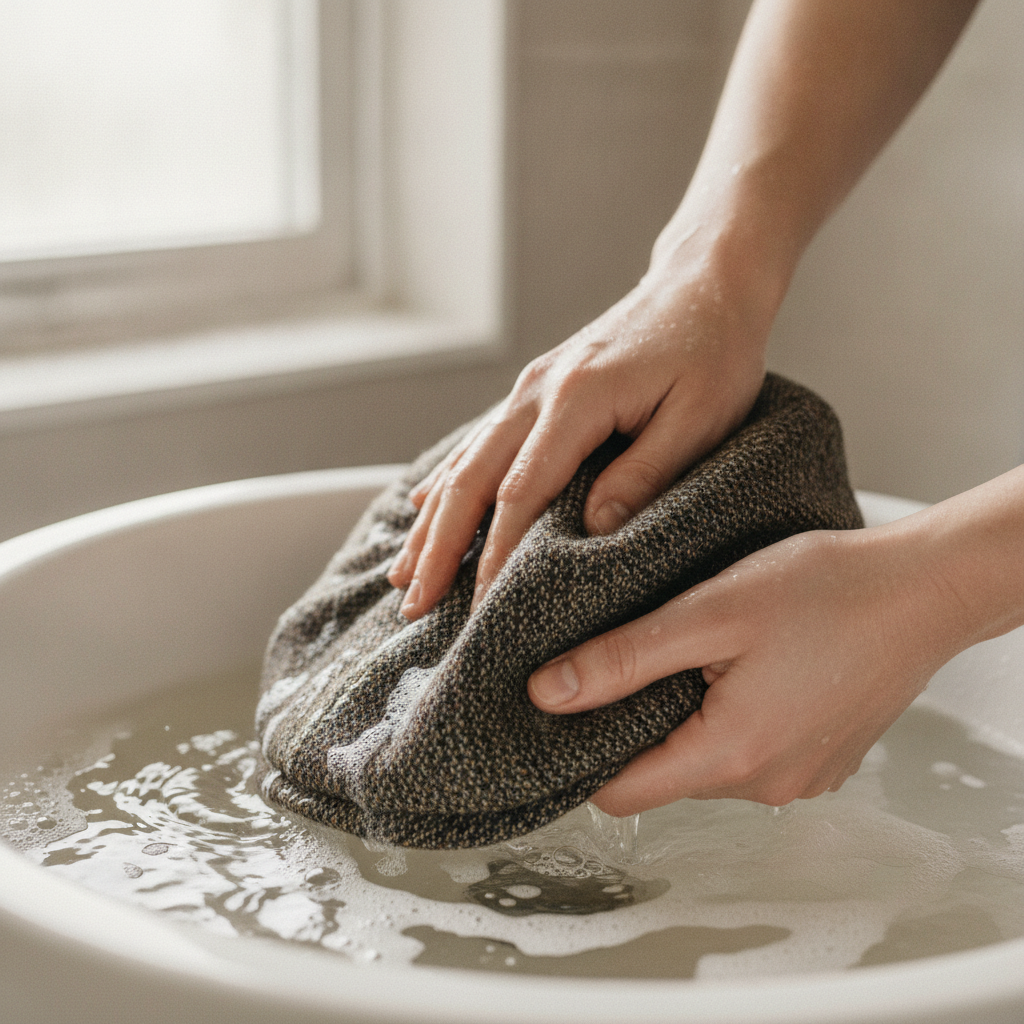
The Ultimate Guide on How to Clean Hats in the United Kingdom
A favourite hat is more than just an accessory; it’s a part of your signature style, a companion on sunny days, and a shield against the unpredictable UK weather. But with regular wear comes the inevitable build-up of dirt, sweat, and grime. Before you consider retiring your beloved headwear, know that learning how to clean hats properly can restore them to their former glory. This comprehensive guide will walk you through the expert methods for cleaning every type of hat, ensuring your entire collection remains fresh, hygienic, and stylish for years to come.
Table of Contents
- 1. Before You Clean: Understanding Your Hat’s Needs
- 2. Essential Hat Cleaning Tools and Supplies
- 3. How to Clean Hats by Hand: The Safest Method
- 4. Machine Washing Hats: Proceed with Caution
- 5. A Deep Dive: Cleaning Specific Hat Types and Materials
- 6. Expert Techniques for Removing Stubborn Stains
- 7. The Crucial Final Step: Drying and Reshaping Your Hat
Before You Clean: Understanding Your Hat’s Needs
Before a single drop of water touches your hat, a preliminary assessment is crucial. Treating a delicate wool fedora the same as a sturdy cotton baseball cap is a recipe for disaster. This initial step will dictate your entire cleaning process and is the key to a successful outcome.
Step 1: Identify the Material
The material of your hat is the single most important factor. Different fibres react differently to water, heat, and cleaning agents. Common hat materials include:
- Cotton: Durable and generally easy to clean. Found in most baseball caps, bucket hats, and beanies.
- Wool (Felt & Knit): Requires gentle handling. Water and heat can cause it to shrink or lose its shape. Common in fedoras, beanies, and classic flat caps.
- Polyester & Synthetics: Generally resilient and can often handle more robust cleaning methods than natural fibres. Often used in sports caps.
- Straw: Very sensitive to water. Should never be saturated. Found in Panama hats, boaters, and sun hats.
- Leather & Suede: Requires specialised cleaning products and cannot be washed with water.
Step 2: Check the Care Label
Your first port of call should always be the care label inside the hat. This small tag contains the manufacturer’s specific instructions and symbols for cleaning. It will tell you whether the hat is hand-wash only, machine washable, or requires professional cleaning. Adhering to these guidelines is the safest way to avoid damage. According to the UK Fashion & Textile Association, these labels provide standardised guidance for garment care across the country.
Step 3: Perform a Colour Fastness Test
Before applying any cleaning solution to the entire hat, always perform a spot test. This ensures the dyes won’t bleed or fade.
- Choose a small, inconspicuous area, like the underside of the brim or inside the sweatband.
- Apply a tiny amount of your chosen cleaning solution with a cotton bud or a white cloth.
- Gently rub the area and then blot it with a clean, dry white cloth.
- If any colour transfers to the cloth, the dye is not stable. In this case, you should only spot-clean with water or seek professional help.
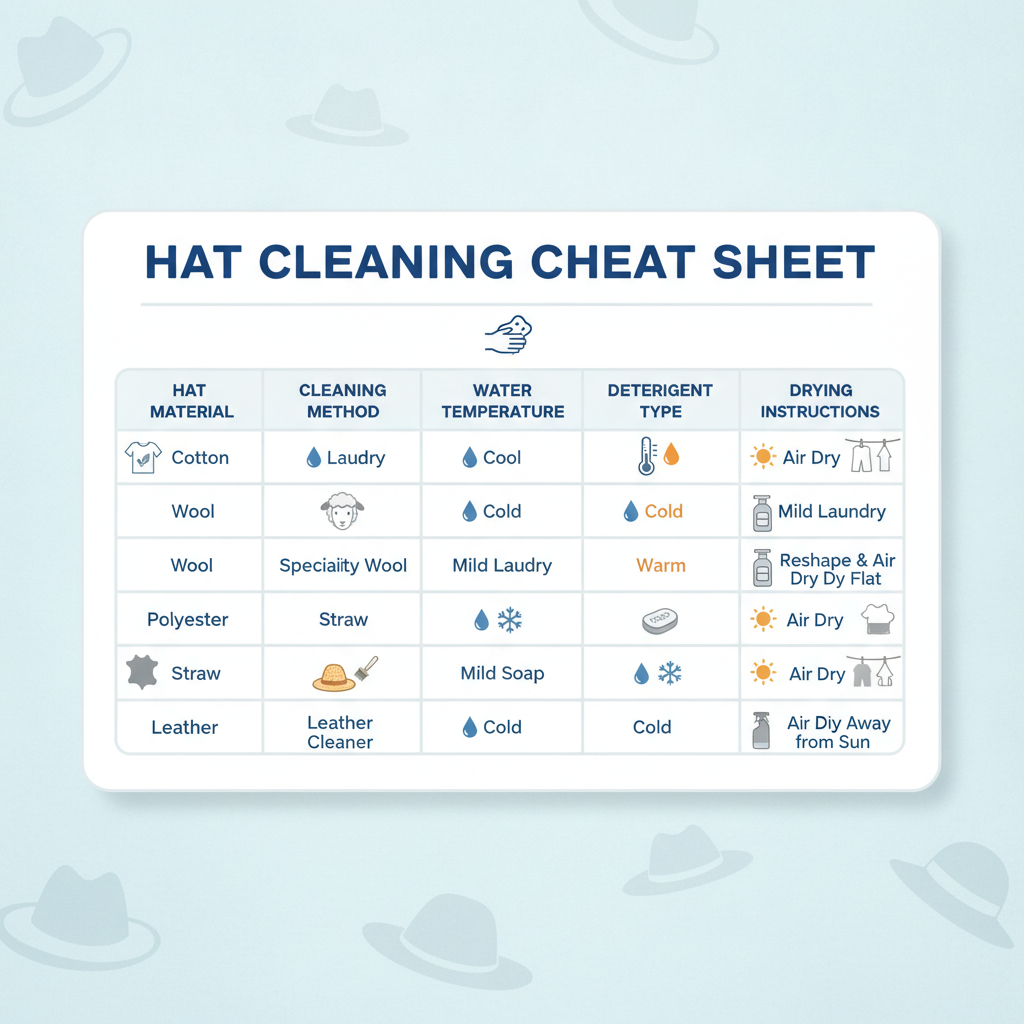
| Material | Water Sensitivity | Recommended Method | Key Consideration |
|---|---|---|---|
| Cotton/Canvas | Low | Hand wash or gentle machine wash | Beware of cardboard brims in older caps. |
| Wool | High | Spot clean or very gentle hand wash | Prone to shrinking and losing shape. |
| Polyester | Low | Hand wash or gentle machine wash | Very durable but can hold odours. |
| Straw | Very High | Spot clean with a damp cloth only | Can become brittle and break if saturated. |
| Leather/Suede | Very High | Specialist leather cleaner only | Water will stain and damage the material. |
Essential Hat Cleaning Tools and Supplies
Having the right tools on hand makes the cleaning process smoother and more effective. You don’t need a professional setup, just a few household items. Gather these before you begin:
- A clean basin or sink: Large enough to fully submerge the hat if you are hand-washing.
- Mild, non-bleach detergent: A wool-specific wash like Woolite or even a gentle baby shampoo is ideal. Harsh detergents can strip colour and damage fibres.
- Soft-bristled brushes: A soft toothbrush, a nail brush, or a dedicated hat brush is perfect for working on stains and general cleaning.
- Microfiber cloths or clean towels: For blotting, wiping, and drying. Choose a light colour to ensure no dye transfer.
- Hat form or a bowl/rolled-up towel: Essential for helping the hat keep its shape while it dries.
- Specialist cleaners (if needed): Such as a dedicated leather cleaner, suede eraser, or a pre-wash stain treatment spray.
How to Clean Hats by Hand: The Safest Method
Hand-washing is, without a doubt, the most reliable and safest way to clean most hats, especially those with delicate structures, materials, or sentimental value. This method gives you complete control over the process, minimising the risk of damage. It’s the go-to technique for most baseball caps, beanies, and cotton or synthetic hats.
Step-by-Step Hand-Washing Instructions:
- Pre-treat Stains: Address any significant stains first. Apply a small amount of your cleaning solution or a specialised stain remover directly to the affected area. Let it sit for 10-15 minutes, then gently work it in with a soft brush in a circular motion.
- Prepare Your Basin: Fill a clean sink or basin with cool to lukewarm water. Never use hot water, as it can cause shrinking and fading. Add a small amount of your mild detergent (about a teaspoon for a full basin) and swish it around to create a gentle, soapy solution.
- Submerge and Soak: Place your hat in the water and gently press it down to ensure it’s fully submerged. Let it soak for 30 minutes to an hour. This will loosen dirt and grime embedded in the fibres. For heavily soiled hats, you might want to extend the soaking time.
- Gentle Cleaning: After soaking, focus on the dirtiest areas, typically the sweatband and the brim. Use your soft-bristled brush dipped in the soapy water to gently scrub these areas. Use circular motions and avoid applying excessive pressure, which could damage the fabric.
- Rinse Thoroughly: Drain the dirty, soapy water. Refill the basin with clean, cool water and submerge the hat again, gently squeezing it to work out the soap. Repeat this rinsing process until no more suds appear and the water runs clear. It’s vital to remove all detergent residue, as it can leave a stiff feeling or attract more dirt.
- Remove Excess Water: Gently squeeze out as much water as you can, but never wring or twist the hat, as this will destroy its shape. Place the hat on a clean, dry towel and carefully blot it to absorb more moisture. You can also roll it up in the towel and press gently.
Machine Washing Hats: Proceed with Caution
While hand-washing is preferred, some durable hats, like polyester or cotton baseball caps (with plastic brims), can survive a trip through the washing machine. However, this method carries risks. The agitation can warp the brim and crown, and the heat from a standard cycle can be detrimental. If you choose this route, follow these safety steps precisely.
How to Safely Machine Wash a Hat:
- Check the Brim: First, ensure the brim is plastic. Bend it slightly; if it creases or feels like cardboard, do not machine wash. Modern caps almost always use plastic, but vintage ones may not.
- Use a Hat Cage or Laundry Bag: A plastic hat cage is a frame that holds the cap’s shape during the wash cycle. It’s a highly recommended investment if you plan to machine wash hats regularly. At a minimum, place the hat in a mesh laundry bag to protect it from snagging.
- Wash with a Light Load: Wash the hat with a small load of similarly coloured light items, like t-shirts or towels. This prevents the hat from being crushed by heavy items like jeans.
- Select the Right Cycle: Always use the ‘delicate’ or ‘hand wash’ cycle on your machine.
- Use Cold Water and Mild Detergent: Just like with hand-washing, use cold water and a small amount of mild, bleach-free detergent.
- Skip the Dryer: Never, ever put a hat in a tumble dryer. The high heat will shrink the fabric and permanently warp the plastic brim. Always air dry.
A Deep Dive: Cleaning Specific Hat Types and Materials
Different hats require different care. A one-size-fits-all approach won’t work. Here’s how to tackle the specific needs of various popular hat styles available in the UK, many of which you can find in our fantastic collection of high-quality hats.
H3: How to Clean Baseball Caps and Snapbacks
Baseball caps are the most commonly washed hats. For most modern caps made of cotton, polyester, or a blend, the hand-washing method detailed above is perfect. The sweatband is the most critical area; pay extra attention to it with your soft brush. If you’re dealing with a vintage cap, be extra cautious of a cardboard brim. If you suspect it’s cardboard, stick to spot-cleaning to avoid turning the brim into mush.
H3: How to Clean Wool Hats (Fedoras, Beanies, Flat Caps)
Wool is a wonderful natural fibre, but it’s sensitive to heat and agitation. According to The Woolmark Company, a global authority on wool, minimal washing is best. For structured wool hats like fedoras or trilbies:
- Dust Removal: Use a soft-bristled hat brush to regularly brush the hat in a counter-clockwise direction to remove dust and surface dirt.
- Spot Cleaning: For small stains, use a damp cloth with a tiny amount of wool-safe detergent. Dab gently; don’t rub.
- Deep Cleaning: A full wash is not recommended. If the hat is very dirty or has lost its shape, it’s best to take it to a professional cleaner or a hatter.
For wool beanies or flat caps, a gentle hand wash is possible:
- Use a wool-specific detergent in cold water.
- Submerge the beanie, gently squeeze the suds through it, and let it soak for about 20 minutes.
- Rinse thoroughly with cold water.
- Gently squeeze out excess water (do not wring) and reshape it while damp. Lay it flat on a towel to dry, away from direct heat or sunlight.
H3: How to Clean Straw Hats (Panamas, Boaters)
Straw hats are for sunny days, but sweat and sun cream can take their toll. Water is the enemy of a straw hat. Never submerge it.
- General Cleaning: Use a clean, damp (not wet) white cloth to gently wipe down the surface of the hat. For stubborn dust, a very soft brush or even the brush attachment of a vacuum cleaner on its lowest setting can work.
- Stain Removal: For specific stains, you can use a slightly more damp cloth with a hint of mild soap. Wipe gently and then immediately wipe the area with another cloth dampened with only water to ‘rinse’ it.
- Sweatband: The inner sweatband can be cleaned more thoroughly. Fold it away from the straw and clean it with a cloth and a solution of water and mild detergent. Be careful not to get the straw wet.
H3: How to Clean Felt Hats
Felt, often used in high-quality hats like those from Maz Accessories, requires a delicate touch. Similar to wool, the key is brushing and minimal moisture.
- Brushing: Use a dedicated hat brush with soft bristles. For light-coloured hats, use a light-bristled brush, and for dark hats, a dark-bristled one to avoid leaving visible lint. Always brush in the direction of the felt’s nap (usually counter-clockwise).
- Minor Marks: Some small marks can be removed with a simple rubber sponge or a specialized felt cleaning sponge.
- Grease Stains: For oily stains, sprinkle a bit of cornstarch or talcum powder on the spot. Let it sit for a few hours to absorb the grease, then brush it off. Repeat if necessary.
Expert Techniques for Removing Stubborn Stains
Sometimes, a general wash isn’t enough to tackle set-in stains. The most common culprit is sweat, which can leave unsightly yellow or white salt stains, particularly on caps worn during exercise.
How to Remove Sweat Stains from Hats
Sweat stains are a combination of salt, proteins, and oils. An effective method involves a mild acid to break them down.
- Create a paste using 4 tablespoons of baking soda and about 60ml of warm water.
- Apply the paste directly to the sweat stains with a soft brush (an old toothbrush works well).
- Let the paste sit and work its magic for up to an hour. You may see it start to lift the stain.
- For an extra boost, you can spray the area with white vinegar after the paste has sat. It will fizz, which is a chemical reaction helping to lift the stain.
- Rinse the area thoroughly with cool water and proceed to wash the entire hat as per the instructions for its material.
This method is generally safe for cotton and synthetic hats. Always spot-test first, especially on darker colours. For more on the science of cleaning, university chemistry departments often provide great resources, like this guide on stain removal from the American Cleaning Institute.
Tackling Other Common Stains
- Makeup: For oil-based makeup, pre-treat with a bit of washing-up liquid, which is designed to cut through grease. For powder-based makeup, try to brush off as much as possible before washing.
- Dirt and Mud: Let the mud dry completely. Once dry, you can often brush most of it off with a stiff brush. Then, treat any remaining stain before washing.
- Grease or Oil: As with felt hats, cornstarch or talcum powder is your best friend. Apply it to the stain, let it absorb the oil, then brush it off before washing.
The Crucial Final Step: Drying and Reshaping Your Hat
How you dry your hat is just as important as how you wash it. The wrong drying technique can ruin all your hard work. The number one rule is: no artificial heat. That means no tumble dryers, no hairdryers, and no placing it on a radiator.
The Proper Drying Process:
- Remove Excess Water: After the final rinse, gently blot the hat with a clean, light-coloured towel. Don’t wring it out.
- Find the Right Shape: This is the most critical part. Your hat needs to dry in its intended shape. You can use:
- A dedicated plastic hat form or shaper.
- A coffee can, a vase, or an upside-down bowl that matches the size of the crown.
- Firmly rolled-up towels stuffed inside the crown to hold its shape.
- Ensure Proper Airflow: Place the shaped hat in a well-ventilated area away from direct sunlight, which can cause fading. Placing it near an open window or a fan can speed up the process.
- Be Patient: Depending on the material and humidity, it can take 24-48 hours for a hat to dry completely. Do not try to wear it until it is 100% dry, as it could stretch and lose its shape.
Taking the time to dry your hat correctly will ensure it looks just as good as it did before washing, maintaining the structure and fit you love. It’s a testament to the care and craftsmanship that goes into quality headwear, something we value deeply. You can learn more about our commitment to craftsmanship on our website.
Key Takeaways
- Always check the label: The manufacturer’s instructions are the safest guide.
- Identify the material: The fabric (cotton, wool, straw) dictates the cleaning method.
- Hand-washing is safest: For most hats, a gentle hand wash in cool water with mild detergent is the best option.
- Avoid the dryer at all costs: High heat will shrink and warp your hat. Always air dry.
- Shape is everything: Use a form, bowl, or towel to maintain the hat’s shape as it dries.
- Spot-test first: Before applying any cleaner, test it on an inconspicuous area to check for colour bleeding.
Can I put my hat in the dishwasher to clean it?
This is a common myth, but we strongly advise against it. Dishwasher detergents are extremely harsh and contain bleach and other chemicals that will strip the colour from your hat. The high heat from the drying cycle can also warp a plastic brim and shrink the fabric. Stick to hand-washing for the best and safest results.
How do I get rid of the sweat smell in my hat?
To neutralize odours, you can use a solution of one part white vinegar to two parts water. Lightly spritz the inside of the hat, especially the sweatband, and let it air dry completely. For a deeper clean, adding a small amount of vinegar or a cup of baking soda to your hand-washing basin can also help eliminate persistent smells.
How often should I clean my hat?
This depends on how often you wear it and for what activities. For a hat worn daily or during exercise, a wash every few weeks is a good idea. For hats worn less frequently, a cleaning once or twice per season, or whenever you notice a stain or odour, is sufficient. Regular brushing of felt or wool hats can extend the time between deep cleanings.
Can I use a hairdryer to speed up the drying process?
No, we do not recommend using a hairdryer. The concentrated, direct heat can be just as damaging as a tumble dryer. It can cause the material to shrink unevenly and can even melt or warp synthetic fibres and plastic components. Patience and air-drying are key to preserving your hat’s integrity.
What’s the best way to clean a vintage hat?
With extreme caution. Vintage hats often use materials like cardboard in the brim and more delicate, less colourfast dyes. Full submersion is almost always a bad idea. Stick to very gentle spot-cleaning with a damp cloth and water only. For valuable or delicate vintage pieces, we highly recommend consulting a professional hat cleaner or restorer.
Conclusion: Protect Your Investment with Proper Hat Care
Learning how to clean hats is a simple yet essential skill for anyone who values their accessories. By understanding your hat’s material, using gentle techniques, and paying close attention to the drying process, you can easily remove dirt, sweat, and stains, significantly extending the life of your headwear. A clean hat not only looks better but also feels more comfortable and hygienic to wear.
Don’t let a bit of grime relegate your favourite hat to the back of the wardrobe. With the expert advice in this guide, you have everything you need to keep your collection in pristine condition. Ready to add a new, high-quality piece to your refreshed collection? Explore the timeless styles and superior craftsmanship at Maz Accessories today.
